Plaster + Demo = Lots of (Heavy)Trash
Before we started demo in the master area Ryan called several of his buddies in hopes they might want to help. Amazingly three of them came over with bells and whistles. I think the word “demo” for guys is like “shopping” to girls…just sayin’.
The first step before destruction was removing all the doors, door jams, and trim. The trim included window/ door casing, baseboard, and crown…which we found out we have tons of…literally tons. The guys carefully removed each piece and did their best not to break or damage the wood. We piled all the trim in the work area of our basement. Our goal was to save as much trim as possible so we can reuse it once we have the new walls built.


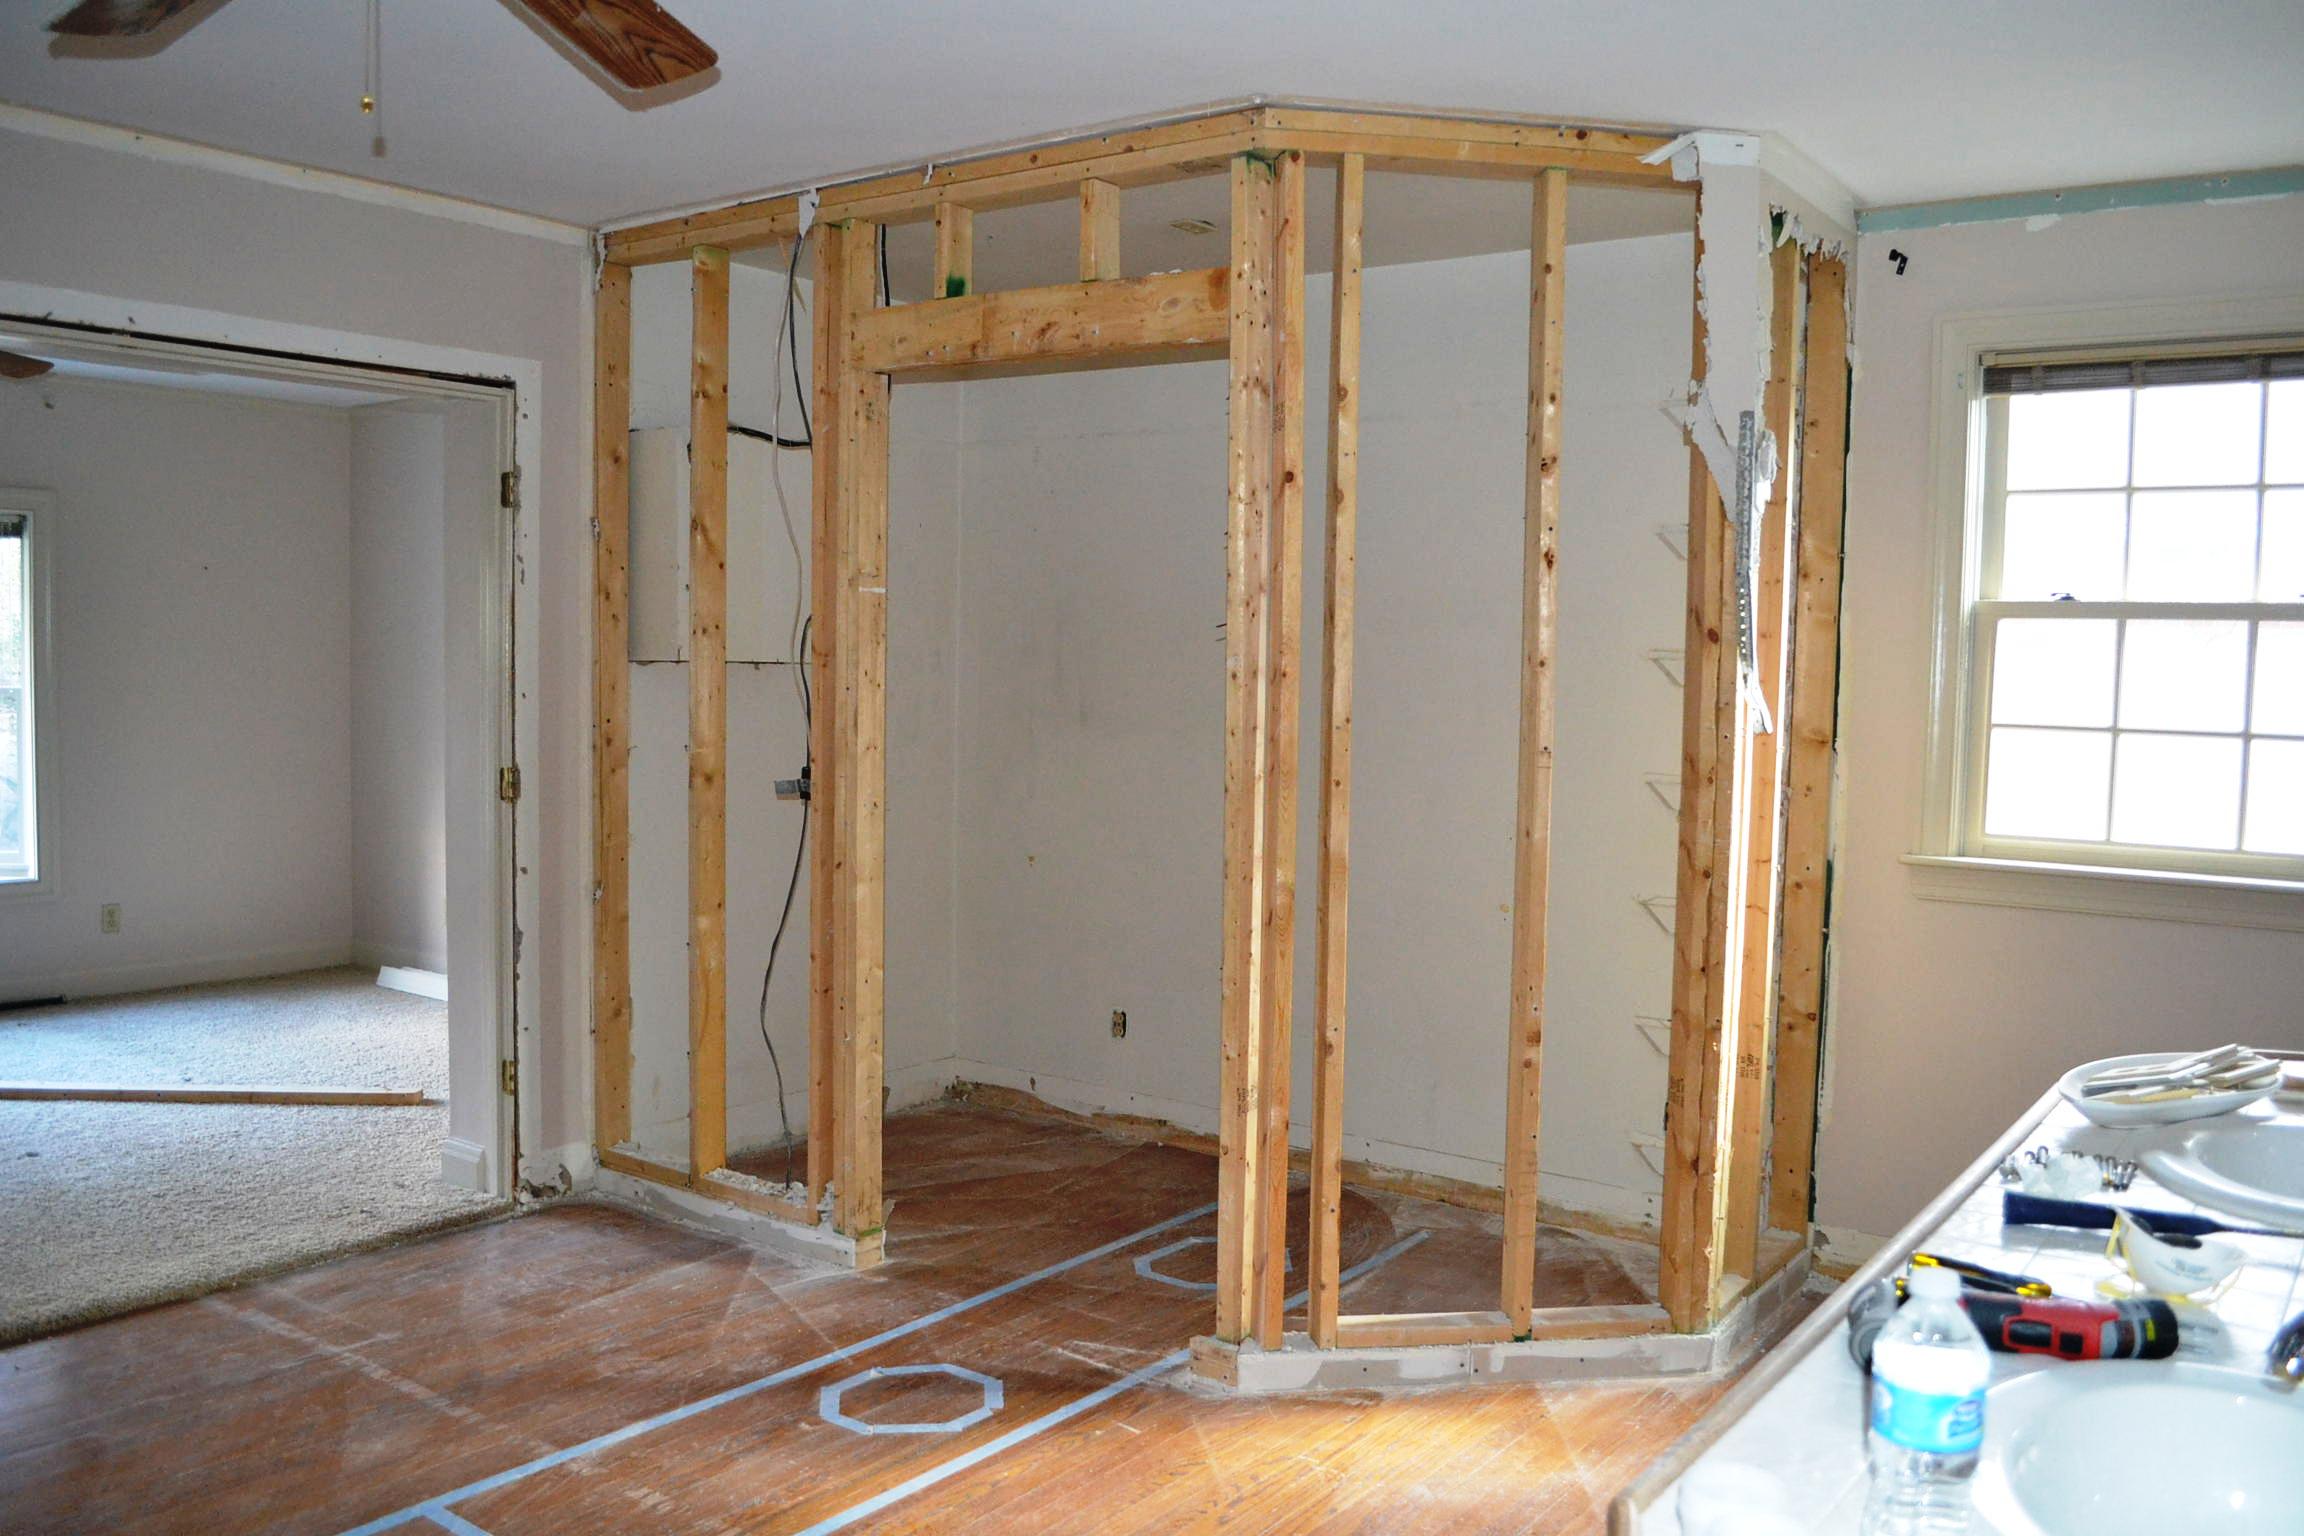
We thought removing the trim would take five minutes. Let’s try like 2 hours. Seriously?! Talk about taking the wind out your sail. I ran to get the guys some lunch and when I returned we were finally ready to start knocking down walls. Demo started in the easiest area…a 1990’s closet addition. The dry wall peeled off fairly easily compared to the rest of the plaster walls. Neither of us had really worked with plaster walls before and quickly learned it’s not a walk in the park. It is so heavy and when you hit it with the sledge hammer it crumbles apart, causing lots of dust and a messy/back breaking removal process.

Next up was the wall between my closet and the butler pantry in the adjacent hallway. Our Friend Ryan R. worked diligently to take this one out, and in no time he was able to see Ryan B. on the other side of the wall.

The guys kept swinging away as I snapped pictures and before we knew it we filled our first truck load of debris in about an hour. At this point several of the guys had to head home to their wives, kids, and their own projects but Ryan and Ryan kept working and went to dump the truck.

While the boys were gone (for what felt like several hours) I continued to pound at the plaster. The dogs continued to hide in fear of all the loud noise. I only discovered two unexpected surprises inside those walls. Two venting tubes that run from the basement to the attic. Luckily it won’t be a huge issue. We can work around the big vent by boxing it in with drywall (it is located in the closet) and the smaller second one can easily be moved to another wall.
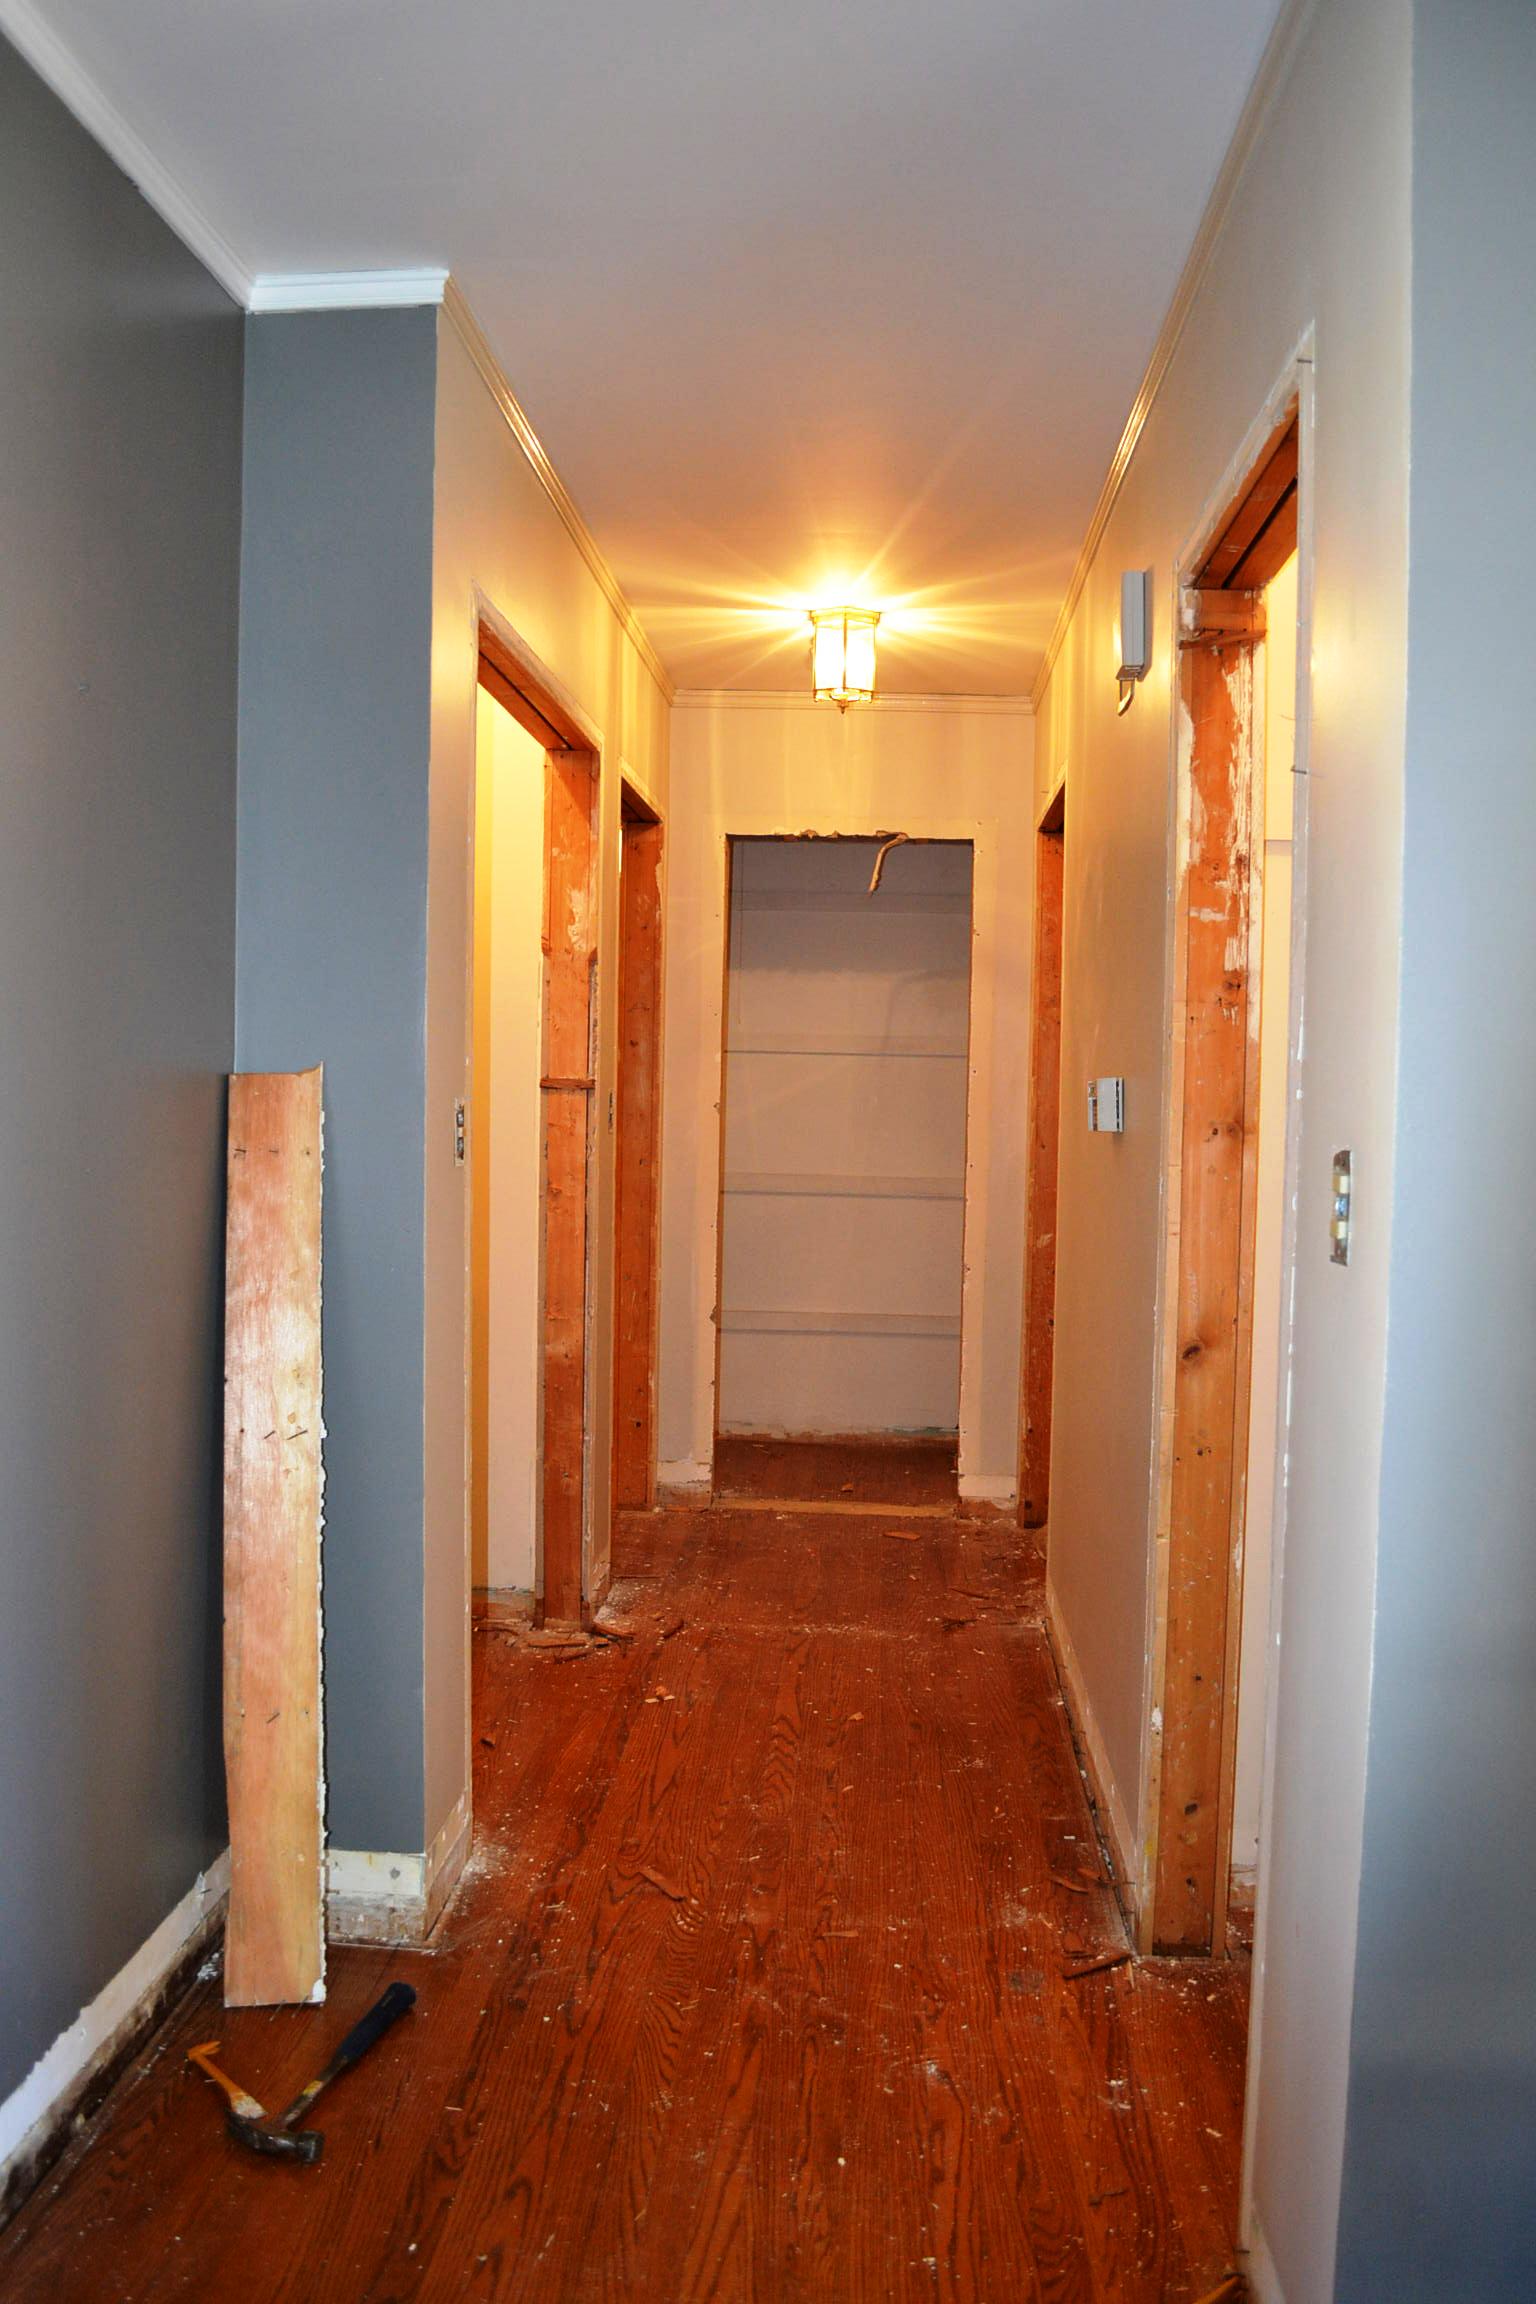
The most aggravating area to demo was the hall between the ante room and the master area. This hall has four closets which means the plaster had to come off not only the outside of the walls, but the inside of all the closets as well. To state the obvious: we worked very careful around the electrical and plumbing.


The most intimidating portion of this whole remodel is this load bearing brick wall. When the house was originally built this area was a sunroom/screened-in-porch. In the 1990’s the porch was converted to interior space and became part of the master bedroom. They dry-walled on top of the brick, built some walls, and installed a window….hence why we have a load bearing brick wall inside out master bedroom.

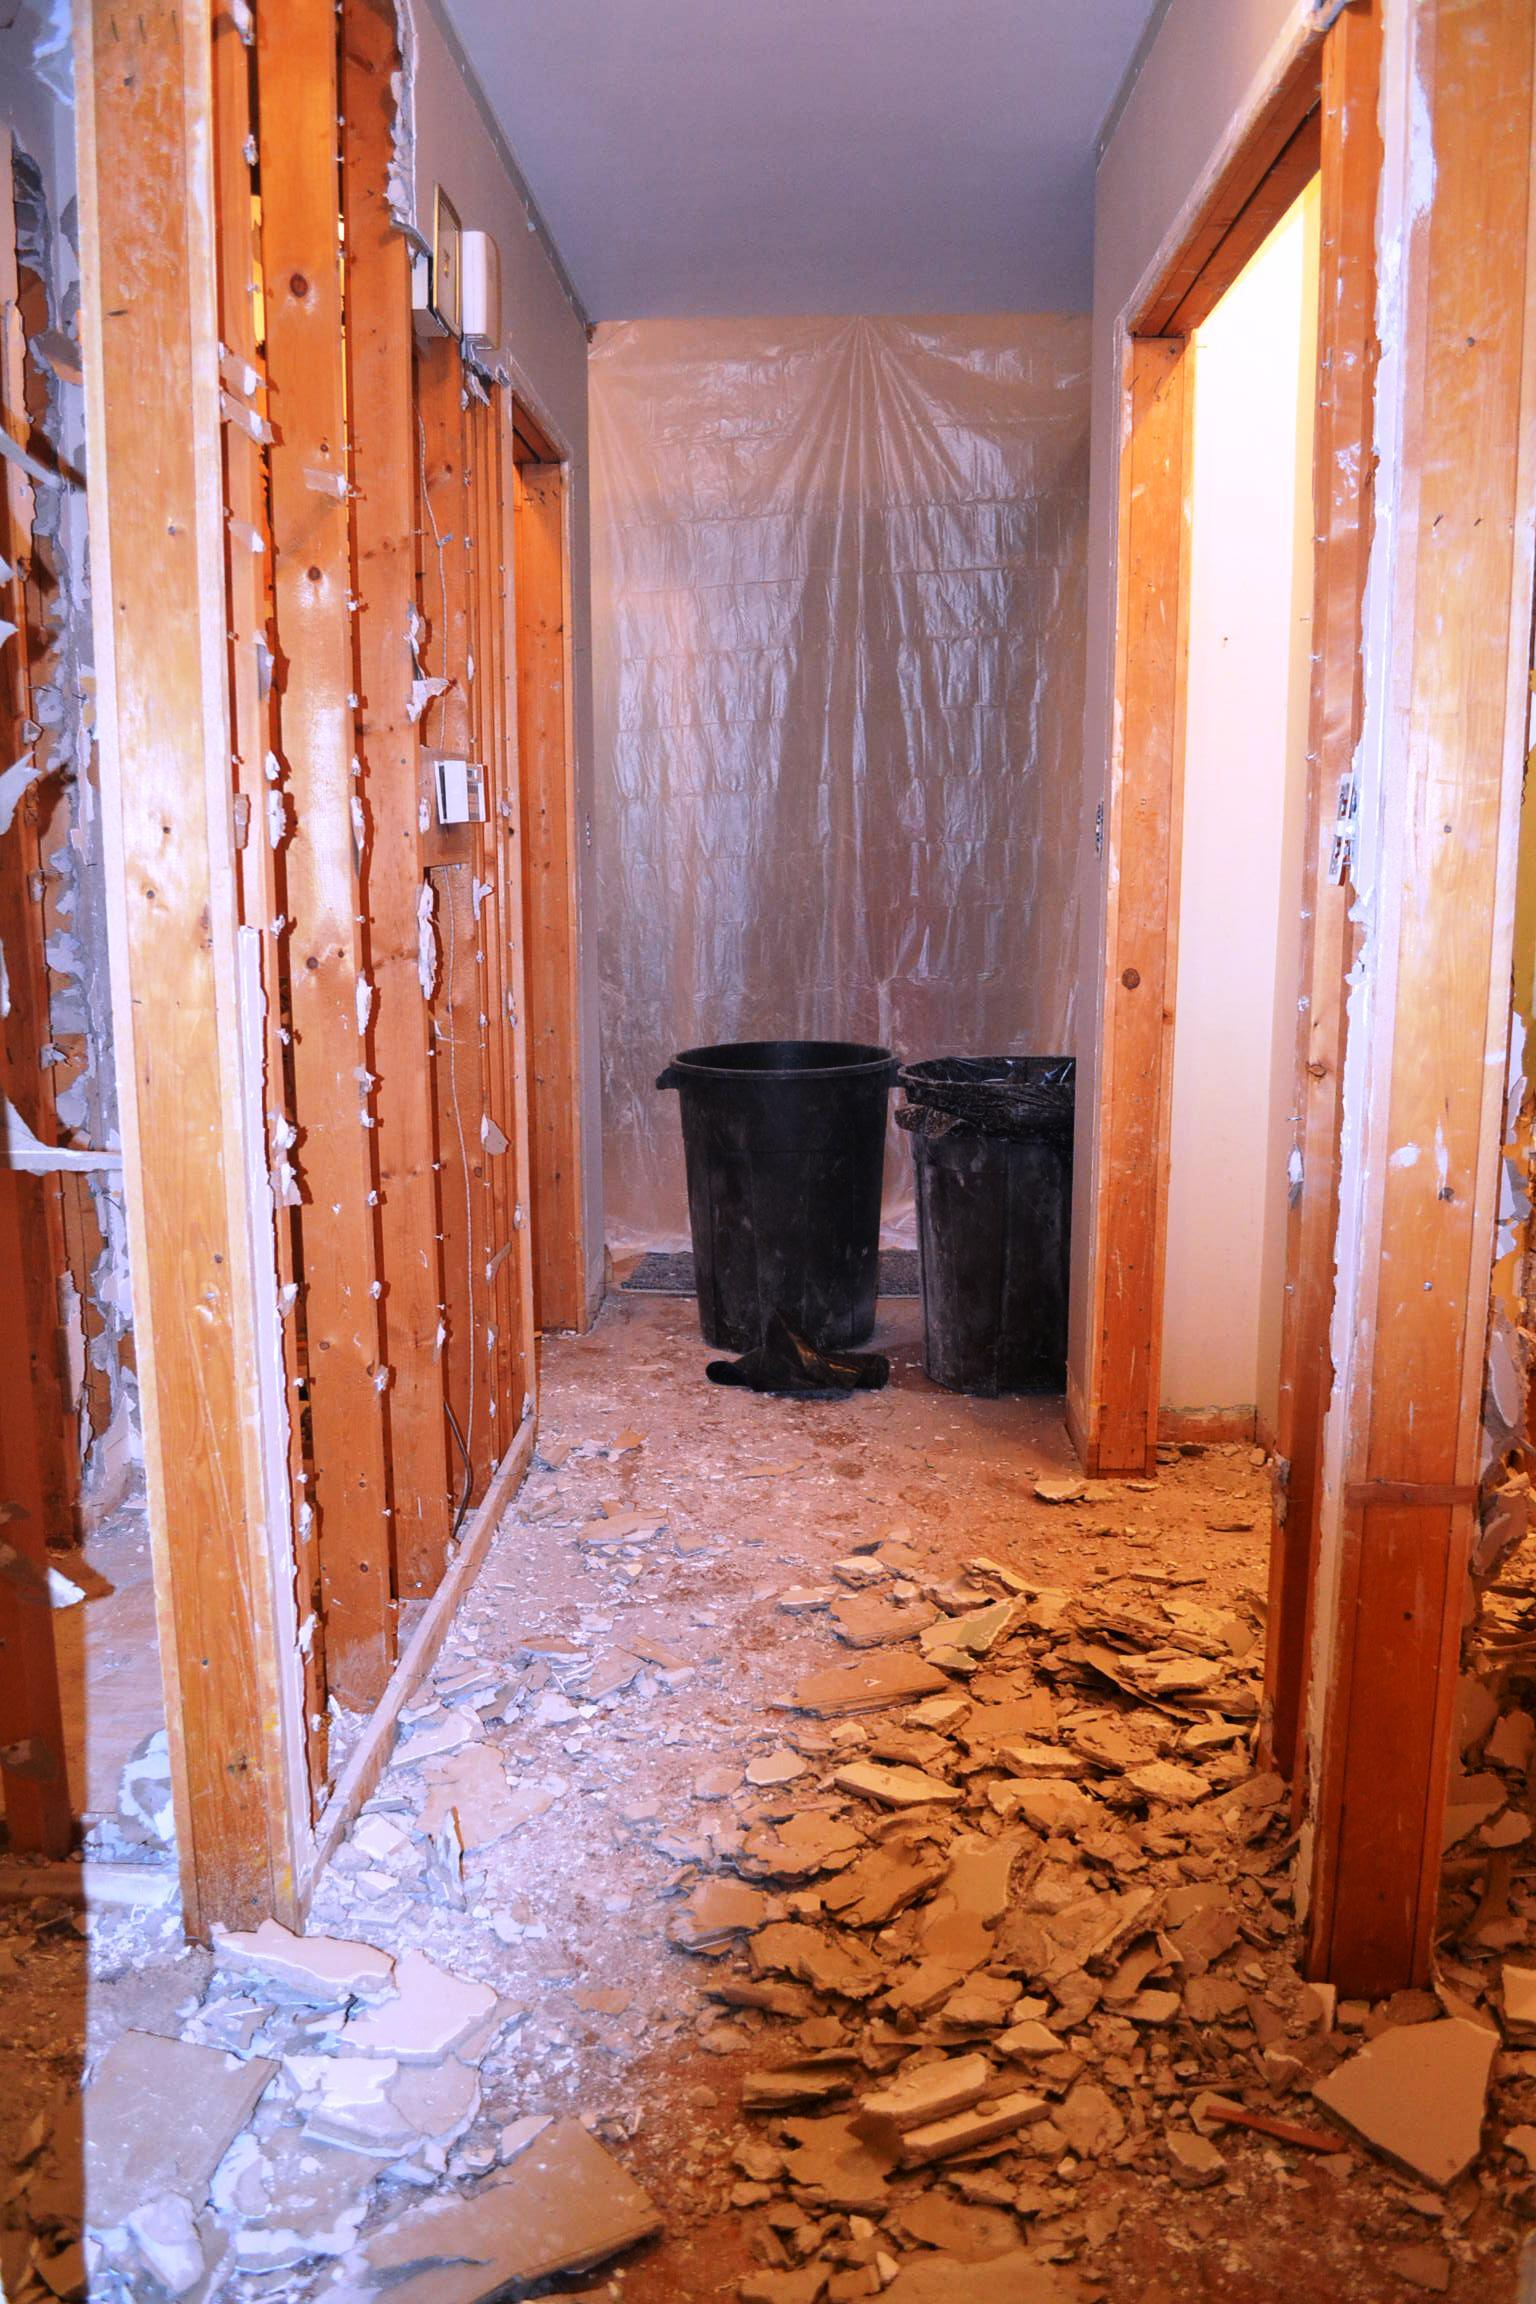
We tried our best to bag the plaster as we went so we didn’t overwhelm ourselves at the end of the day(s). We also invested an air purifier and plastic sheeting. The sheeting is tacked and taped to all the doorways in the foyer area. Our goal is to keep the dust to a minimum in the rest of the house. While we still have dust everywhere, I can only imagine what it would like like if we skipped this step in the process.


The removal of the vanity from the dressing room went fairly smoothly. Ryan pried at the tiled countertop in several places then ‘pop’, off it came. He removed one of the sinks before hand, but the caulk around them was just ridiculous, so the second sink remained in tact and went down with the ship. We had hoped to donate them both to Habitat for Humanity, but some things are better left for the trash. We unscrewed the cabinets and they were also moved to the basement. I plan to refinish and reuse these cabinets in my basement craft room. Luckily the mirror came down in one piece (score!)…I had disaster written all over that one, sorry babe!


Naturally, the next step was to hammer out the shower tile. You gotta love the sound of tile falling off the wall and hitting the floor in pieces.


And then we did the same to the other side of the shower…still gaining joy from the breaking sound when the tile hit the floor.

I’ve estimated that we’ve used somewhere around 125 contractor bags so far in our demo. Its unfortunate that plaster weighs so much. We can only fill each contractor bag about half full…which seems like a complete waste of expensive trash bags if you ask me. Someone (maybe me?!) should invent “half trash bags”. If half-sized trash bags existed I wouldn’t feel like I’m wasting so many bags! Maybe they already exist and I just don’t know about them…

The other day Ryan removed the commode and the wall tile in the old bath. We plan to build a wall for the shower and turn this little area into a water closet . I was amazed how the tile just fell off the wall with a little tug of the crow bar….complete 180 of the experience we had at our first house when we remodeled our guest bath.

It case you couldn’t follow what we are doing in the mess of photos above, here is the demo plan and the ‘before’ and ‘progress’ side-by-sides:


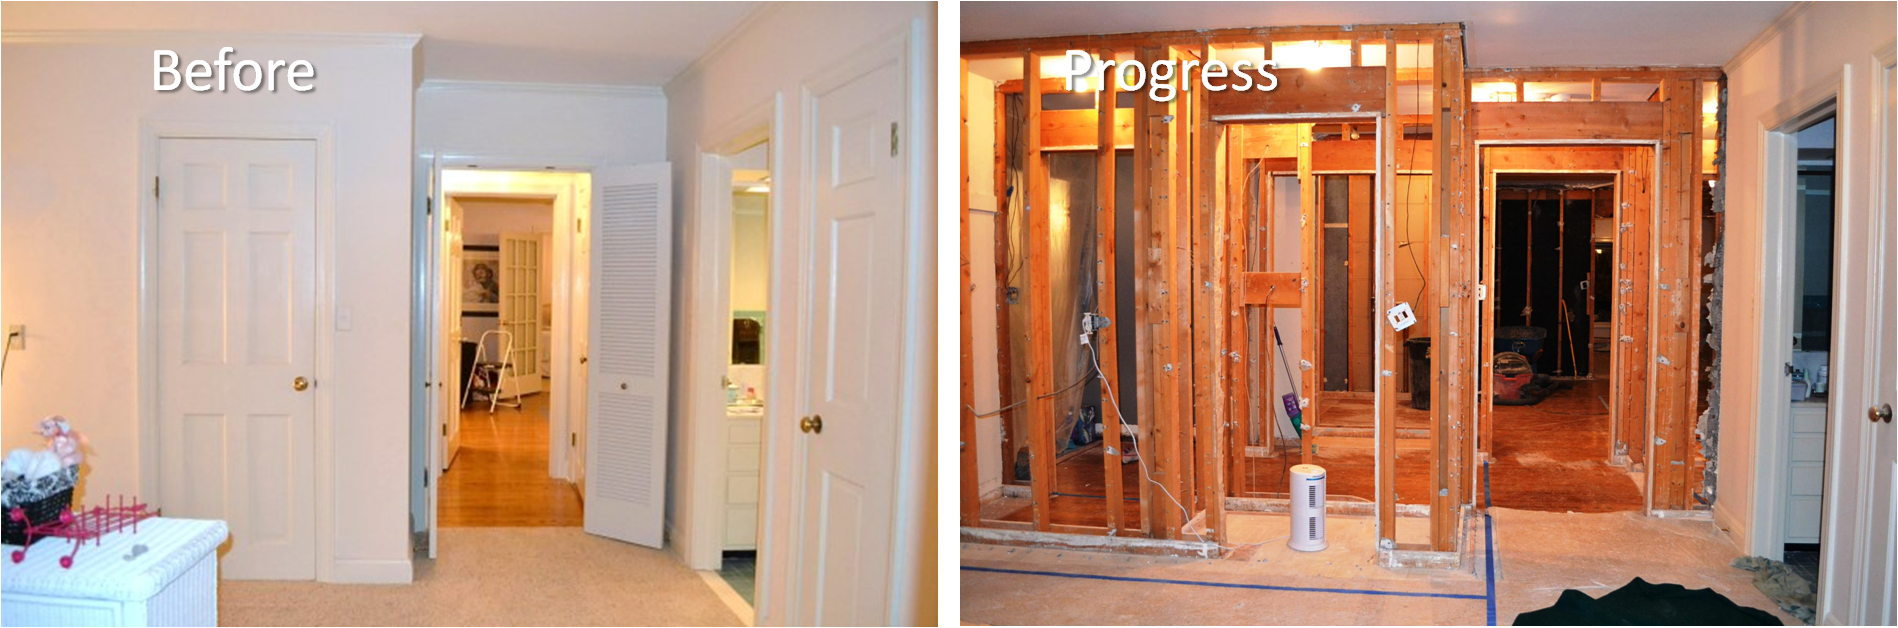


With the plaster down we finally have a realistic look at what we’re working with. We decided to call architect Aric Margolis back to the house and have him check the bones, just to be on the safe side. He informed us the wall we are removing in the hall will need extra support in the attic. We have to add a 26′ foot beam, but luckily it will only be visible in the attic and wont affect the room visually (unlike the load bearing brick wall which will be replaced with a visible beam the length of the room). Once Ryan gets the attic beam in place we are safe to start knocking out the studs and begin building new walls. ….Just another day in the Bauer house.

Comments are closed.